Wednesday, July 29, 2015

It's What's for Dinner

That's right, people. It's beef time.

But first, we have to butcher. As you know, this is my least favorite part of the class. Chef gives me this:
This is called deckle. It's the cover of the ribs and it is a very, very tough piece of meat. Chef told me to trim it and make it look somewhat appetizing.
This wasn't all of it... The bigger piece was on a different sheet pan. Anyway, I was in charge of tenderizing this meat. A large part of day 1 of beef was knowing the difference between the tender and tough cuts of meat. So, the deckle and chuck are much tougher than the shoulder or the first cut. The first cut of the ribs is the rib that is closest to the sirloin. According to Jewish law, the sirloin is not considered kosher, so the first cut is the closest thing we have to it.

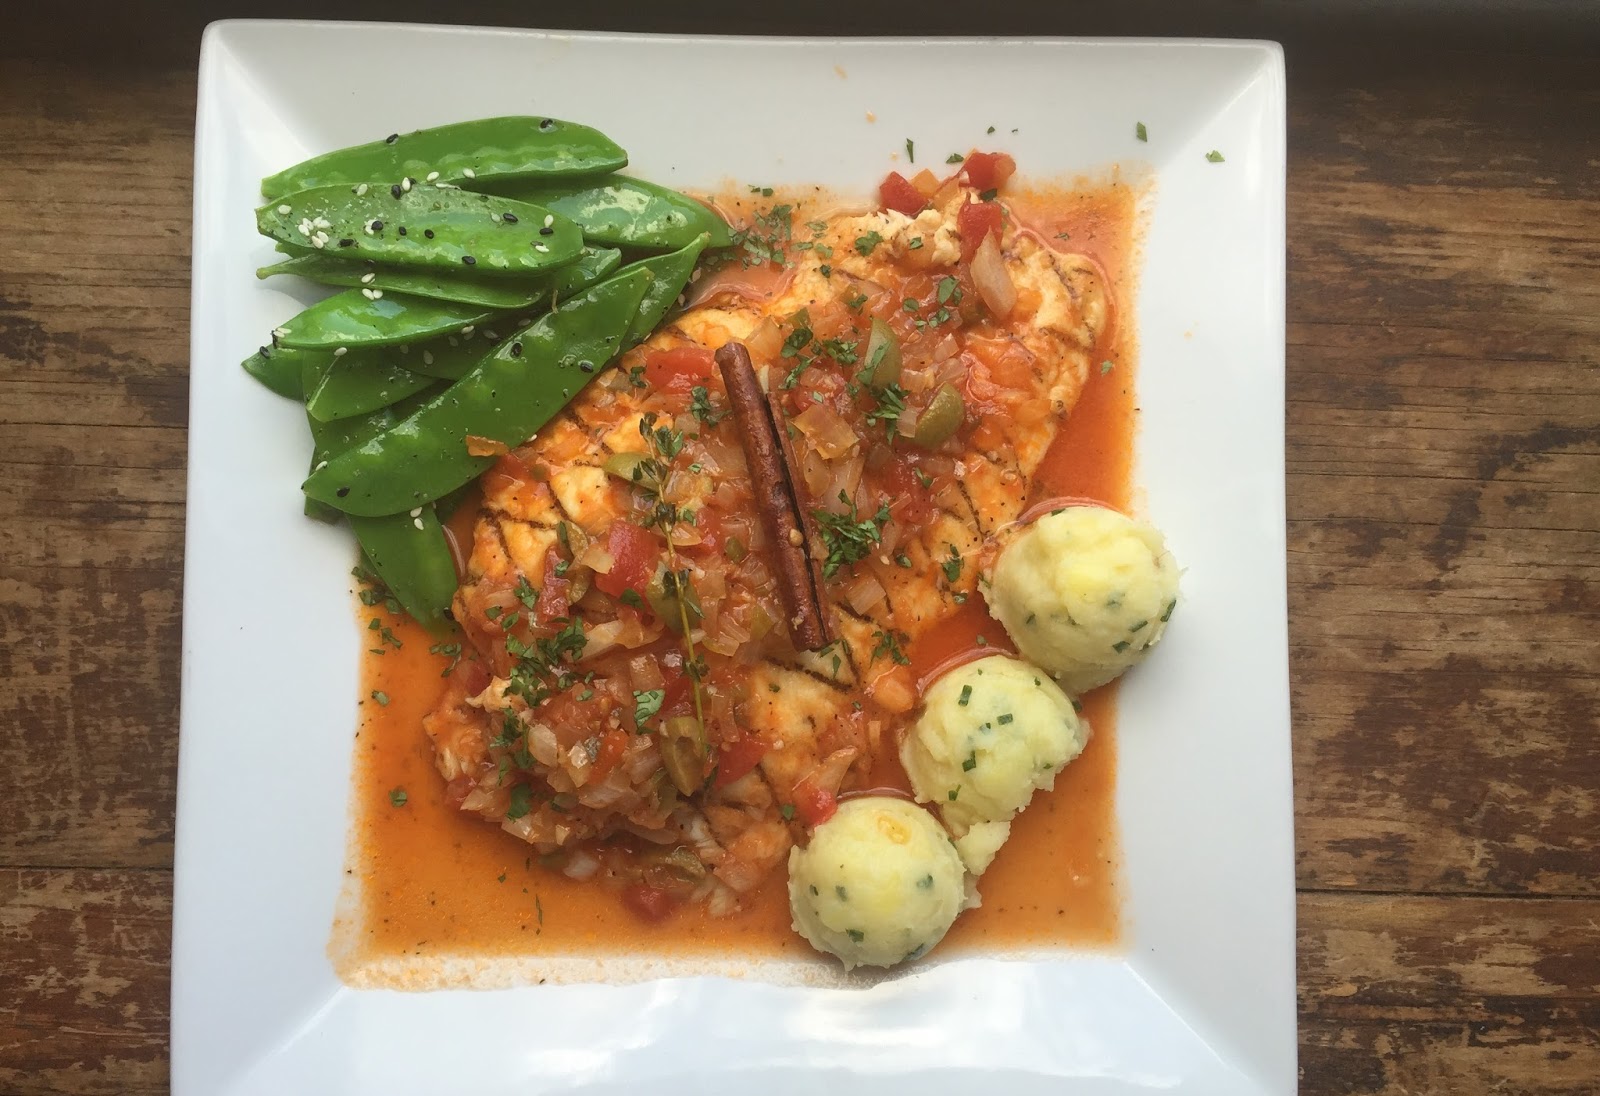
I took the deckle and put on this FANTASTIC dry rub. I don't know everything that went in it, but I do know that it's one of the most incredible things I've tasted. Sugar, salt, and a ton of spices, is my guess. Anyway, after I put on the rub, I oiled the meat and placed it into an already smoking hot rondue. I browned the meat for about 10 minutes, flipping a few times, and then deglazed the pan with cider vinegar. Then added (homemade) barbecue sauce and some water to thin it out, and I boiled it hard. Once it came to a boil, I covered it tightly and put it in the oven for about an hour and a half. This meat will continue to get more and more tender the longer it's in the oven, but you just have to make sure it has enough liquid. The intention was that the meat would be in for 3 hours but we didn't have enough time. Once I removed the meat, I started shredding it. Can you guess what we're making? You'll see tomorrow!


Although this was really the meat of my job in the class, we also did a beef and broccoli to see how to work with extremely tender meat. We heated up the woks and added the beef for about two minutes, mixing constantly. The beef was removed and the sauce was started. Very chinese restaurant themed. Soy sauce, sesame oil, chilies, and a slurry (cornstarch dissolved in cold water) to act as a thickener. The beef was added back to the wok and everything was tossed together and served over rice.

Rice. Let's talk about rice. Some of you know, and I think I've mentioned it here before, I suck at making rice. It is my Everest. I got through rice day with no problem, and I had a feeling that was largely due to my buddy. It's much easier to get through a dish, even if you're making your own dish, with some moral support.

This day was a bit different. Every once in a while, Chef will ask an individual to make something on their own, kind of like he asked me to take care of the deckle. One day he asked someone to make a rice pilaf. Just put up a rice pilaf for us, please. The rice on that particular day did not come out as planned, and so, everyday after that, Chef asked that individual to make a rice pilaf until it was perfect. Just a disclaimer: that individual was not me.

Because of my history with rice, I have been petrified that Chef was going to casually asked me to make a rice pilaf, when I haven't made a rice since rice day. I don't remember the process, technique, or measurements and I'm very nervous that I was going to screw it up and Chef would have me make rice everyday for the rest of the summer. And then. He asked me. To make a rice pilaf. For the whole class.

My buddy and I were now on completely separate assignments for the entire day and it was a little disheartening. We didn't like it so much. But, I guess we have to prove that we can work independently, blah blah blah. Turns out, I didn't make enough rice, so Chef asked my buddy to make a double recipe, but for the time that I was making my rice, we were on different dishes.

Anyway, the water reduced by half and I covered it and put it in an oven at 300 for 20 minutes. When I took it out, I kept it covered until we were ready to serve with with the beef and broccoli. Then came the taste test.

Right on the money. That's a direct quote.

Mic drop.

Tip of the day: When braising your meat in a liquid, be sure to check on it and flip it. Also, make sure that your liquid is not reducing too much; you want plenty of liquid in with your meat to get it tender. If you see that you're running out of liquid, you can add more water or barbecue sauce and cover it tightly. 

One Fish, Two Fish

It's safe to say that we have red fish and blue fish on day 2 of fish. Blue? Fine, maybe not literally blue, but it is called Blue Fin Tuna. Whatever. Also, white fish.

On day 1, Chef did a demo of a salt crusted sea bass. I can't imagine anyone actually makes this at home, but it is a great technique and a really great table side presentation.

First, we toasted crushed black peppercorns and coriander seeds. Then, we coated the inside of the (whole) striped bass with the spice mixture. We then placed sliced lemons and fennel inside the fish cavity.
Here comes the good party. We mixed an ENTIRE box of kosher salt (read: an entire box of kosher salt) with a couple of egg whites to help hold the mixture together, and lined the pan with some salt. We placed the fish on top of the salt and then completely smothered the fish with the salt mixture.

When the fish is cooking in the oven, it's not baking. It's steaming. The salt creates a seal and ends up steaming the fish inside. After it's out of the oven, you peel off the salt and take out the fennel and lemon, and serve the fish that's been steamed. And, spoiler alert: The fish is not at all salty.

Another dish we did on Friday (delayed post) was a Vera Cruz. This was one of the (many) times that Chef has given all of us an entree to make and told us that we have to have a complete dish by the end of the day. So, on top of a new recipe we're making, we need two other dishes to worry about as well.

One of the hardest things to do in the kitchen (according to Chef) is to grill a fillet of fish. So, he gave us the option to saute the fish or bake it, but you know me, I needed to tackle the grill. I wanted to get the grill marks to come through on the dish. Also, I wanted to try the challenge of grilling a very delicate piece of fish. Game on.

So, I dredged the fish in flour, shook off the excess, and then dipped it in a bit of high temperature oil. Then, my heart started pounding and my hands started shaking. Keep the fish on for 2 seconds too long, and it'll fall apart on grill, Chef said. With his voice echoing in my head, I put the fish on the grill and counted to twenty, gently picked it up with tongs and cross hatched it for another twenty, quickly took it off the grill, onto a sizzle plate, and into the oven.

We started the sauce which has a tomato base, some cinnamon sticks, olives, and capers. It had some interesting mixture, to say the least. We got the sauce going in a pan, and once it was boiling, took the fish out of the oven and sent it for one final swim.

My finished plate looked like this:
Notice the grill marks, please. I worked very hard on them. For a full forty seconds. Also pictured: celery root and potato mash with chives and sesame oiled sugar snap peas.

Tip of the day: When grilling fish. Don't mess up. Work quickly and gently. You only have to grill one side (the presentation side). When putting the fish on the grill, make sure to put it presentation side down. This means that the skin side will be on top. Always season your flour before breading any protein. Salt, pepper, and an herb should do the trick.

Sunday, July 26, 2015

If you can't take the fish, get out of the kitchen

Fish day. Gross, right? Well, gross for a reason different than you think. When Chef told us that fish day(s) were coming up, we all made the face. The same face you're probably making right now when you're thinking, "Ugh, really? I have to read about fish for the next couple of days?"

Turns out, fish only smells like fish when it's not fresh. So, I walked in on Thursday morning thinking the place was going to reek of fish, but I was so wrong! We had the whole room filled with whole, striped bass, and the place didn't smell at all! Promise.

The first thing we did was meet our fish.
Poor guy, never saw it coming. I'm not going to show you the "after" pictures, because it's pretty gross, but trust me: I. Filleted. This. Fish.

On day 1, my buddy and I were asked to make a ceviche. Well, I think we kinda volunteered. I was interested in making it since I'd never had ceviche before.

For those of you who don't know, a ceviche is, essentially, raw fish which is marinated in an acid that cooks the fish. The texture of the fish in a ceviche is like raw fish, so if you're not into that, I don't think ceviche is for you.

The recipe for the ceviche is similar to that of a pico de gallo: diced onions, tomatoes, serrano pepper, and, of course, lots and lots of lime juice.

First, the fish was marinated by itself in the lime juice, for about an hour. Then, we added the mise en place and it continued to marinate together.


One of my classmates walked in on fish day and told Chef, "Chef, I'll cook the fish, but I really really don't like fish at all. It's so fishy." Without even blinking he said, "you've been eating old fish." By the end of day 2, she said, "Chef, I can't believe you made me like fish."
Tip of the day: We've already spoken about the freshness of fish. If you want to buy fresh fish, don't buy the stuff that smells like fish. For the freshest fish, go to a fish market or store, look for a whole fish with the reddest gills, and ask them to fillet it for you. That way, you know exactly what you're getting. Often times the fish you get at the supermarket can be close to two weeks old. 

Home in time for the Hollandaise

We continued last week (sorry for the late post) with no meat, since the 9 days end today (yay!). After learning about emulsions (temporary and permanent) we needed to learn about the classic Hollandaise and Béarnaise sauces.

The largest part of a Hollandaise is butter, so the success or failure of the sauce depends not only on skillfully combining egg yolks, water, acid, and butter into a rich, creamy sauce, but also on the quality of the butter itself. Unfortunately, we could only use clarified margarine, since we cook in a meat kitchen, and Jewish law prohibits cooking meat and dairy together. Even though we used margarine, we still got the idea of the sauce. I was really excited to be making it since it's something that I've never had before. Little did I know that this was going to be quite the workout.

In general, the ratio of egg to butter is 1 yolk to every 2-3 ounces of butter. The more eggs you have, the more butter the sauce can handle.

An acid is also added to the sauce for flavor and to help the eggs hold the butter together. The acid can be either a vinegar reduction and/or lemon juice. In our case, we used both. We reduced the vinegar with peppercorns to make a strong, concentrated flavor.
And then, the real work started. I combined a few egg yolks and started whisking them in a large metal bowl by hand. Slowly, I added the vinegar reduction and (continuously whisking) brought the bowl over to a pot of boiling water. I rested the bowl on the pot of water and continued to furiously whisk the eggs and reduction. It was really tricky because you don't want your bowl to get too hot that the eggs start to cook; we don't want to have scrambled eggs on our hands. You also don't want to mixture to cool off too much, either. So it was an aerobic effort to keep my eggs at the desired temperature. On, off, whisk, on, whisk, off, on, whisk. I was so tired. My arm was killing, my wrist was aching, but I did NOT want to be the one who broke a hollandaise. Chef said he was going to make an example out of the broken sauce and show us how to fix it. But I certainly did not want mine to be the example.

Once I got the eggs thick enough (like ribbons, whatever that means), it was time to add the butter. (I'll just call it butter here even though we used margarine, because, gross). I had the measured out butter next to me and, while whisking with my right hand, I slowly streamed in the butter with my left, making sure that as soon as the butter hit the eggs, it was whisked in immediately. As I was whisking, I noticed my sauce was a little thick, so I added a few drops of boiling water just to thin it out a little. Finally, I was able to stop whisking. I tasted and added salt and a little cayenne pepper, and squeezed some fresh lemon juice in there as well. Because we were using margarine, the taste really came through, so I used more vinegar reduction than was suggested, and I squeezed a bit more lemon at the end, and I really liked the result. It was a bit less "margarine-y" than the others.

A Béarnaise sauce, while very similar to the Hollandaise, has a tarragon and vinegar reduction, and with white wine instead of lemon juice.

We also got started on a risotto, which is a rice that needs love for 25 minutes straight. We used dried shitake mushrooms, and placed them in a bowl with boiling water and consume mix (so it would remain parve).

I sauteed finely diced onions in a saute pan for a minute or two, and then added the rice. I mixed the rice until it started to toast a little, and then slowly added the consume/mushroom water (without the mushrooms). I added a cup at a time, and continued to mix the rice until the liquid was absorbed, and then I added another cup, absorbed, and repeated.
I added the mushrooms once the rice was tender, and also added a splash on truffle oil for the aroma. Seasoned with salt and pepper and turned off the heat.

Meanwhile, I had blanched some broccoli rabe, which is naturally very bitter tasting. The bitterness can be removed by adding some acid, like lemon juice, and I added some crushed red pepper flakes, too. The broccoli rabe was chopped up and reserved to be put on top of the mushroom risotto.
This is a nice vegetarian dish that I can make for all of my vegetarian friends. I do have a few. Hi girls!

Tip of the day: When whisking a Hollandaise or a Béarnaise, you're arm is going to want to fall off if you use your upper arm strength to mix. The trick is, it's all in the wrist. This goes for pretty much any whisking work you'll need to do by hand, not just for a Hollandaise. Use your wrist for all of the whisking and you'll be able to stand it for much longer.  

Tuesday, July 21, 2015

It's just the tip of the iceberg

Since this week we're cooking a lot during the 9 days (a period of mourning the destruction of the first and second temples) and traditionally Ashkenazi Jews don't eat meat or poultry during this time, Chef had to get creative with our schedule this week.

Yesterday and today were salad days! Now, you may ask, why two days for salads? Can't you just follow a recipe for a dressing and put some vegetables in a bowl and toss? Why, yes. Yes you can. But you can also do a ton of other things.

First things first. What is a salad? The first thing that probably comes to mind is lettuce, raw vegetables, and a dressing. That isn't wrong. But is it right? What about a fruit salad? Tuna salad? Pasta? Sushi salad? I could go on.... Potato salad? Rice? Corn? Come on, people. We can come up with more. But more importantly, can we come up with a definition of a salad? Anyone have any ideas?

Yesterday we went through some different types of salads:

  • Tossed Salad- Lightly covered with an oil and vinegar dressing
  • Composed Salad- Each item on the plate as its own place and is individually seasoned
  • Bound Salad- Something like a tuna or egg salad that is bound by mayonnaise, yogurt, cream cheese, or sour cream, etc.
We spoke about emulsions, where two or more items that don't want to go together (like oil and vinegar) are forced together. We also went through different types of emulsions:
  • Temporary emulsion- Something like a vinaigrette (2/3 oil and 1/3 vinegar) are mixed with herbs and spices and is shaken just before serving.  
  • Permanent emulsion- Something like a mayonnaise or aioli. Permanent emulsions have something which holds the oil and vinegar together like egg yolks or mustard. These are whisked pretty hard in order to make it thick. The thicker it is, the more flavor you can add to it. 


When making any type of dressing, add all the other ingredients together first, and then drizzle in the oil like I did above.

We made a tossed salad yesterday, with jicama (tastes like a blend of an apple and a potato), red onion, and oranges with a poppy seed dressing. All of the ingredients were tossed together to create a great appetizer:

The martini glass rim was lightly dipped in egg whites and then dipped in poppy seeds to make this adorable presentation. Come on, how cute?

Today was about composed salads. A classic composed salad is a Salad Nicoise. In this salad, Chef told us that there are a bunch of ingredients that are a "must," such as hard boiled eggs, potatoes, tuna, green beans, red onions, olives, cucumbers, and tomatoes. Again, every component on this dish has to be seasoned or presentable on its own since the salad is not all tossed together.
Even though salads are simpler than, let's say, making pasta from scratch or making a soup or lamb chops, this is probably a plate of mine that I'm proudest of. I crusted the tuna with peppercorns and coriander seeds, got a pan white hot, drizzled oil on the tuna (not the pan) and placed the tuna, one side at a time to sear in the pan. You want your pan so hot that the tuna sizzles and whistles when it hits the pan. The potatoes and cucumbers were marinated in the vinaigrette for a few minutes, the tomatoes were cut brunoise with basil chiffonade and seasoned with salt and pepper. The green beans (which are under the tuna) were blanched in heavily salted water and shocked in an ice bath (to keep the bright green color), and the lettuce under everything was lightly tossed with the vinaigrette before everything else was placed on top.

Tip of the day: When choosing a lettuce as your base, think about the bitterness or sweetness of it and how it'll pair with your dressing. For example, our bitter lettuces are romaine, radicchio, and endive (to name a few) are paired well with a sweeter dressing, so look (or create) dressings with sugar, honey, or agave in them to help balance out the bitterness of the lettuce. 

Sunday, July 19, 2015

Udon even know..

I've always wanted to make my own pasta but I don't have a pasta machine nor do I have the best kitchen. But, the pasta few days were really fun since we got to make it from scratch! Not only that, but we also made vegetable pasta. You know the boxed noodles with green and red pasta? We made that.

First, we put the flour in a bowl and made a well and put the eggs, oil, and water in the middle.
Then we kneaded the dough into a ball until it was no longer sticky and hid it under a bowl so that the air wouldn't make the dough hard while it sits.
Here comes the broccoli pasta! I blanched some broccoli, strained it, and then put it in a few layers of cheesecloth and squeezed all of the liquid out. We put the broccoli into a food processor with flour, eggs, and oil until it made this green dough:

Back to the regular dough, we rolled it out and then folded it into a rectangle and then rolled it out again. Then we put it through the pasta machine at least 7 times, each time changing the setting so that the dough kept getting thinner. Then we ran it through to slice it into fettuccine.  
And we also made marinara sauce and pesto sauce to make these delicious dishes!

Tip of the day: If you're starting to cook a lot of dishes in one shot and you think you'll need a pot of boiling water for a few purposes, fill up a big stock pot with water at the start of your cooking. Work on other things while it gets to a boil, and then use that pot to get water for smaller pots of boiling water so you don't have to constantly wait for your water to boil. This really came in handy on Friday when I was scrambling in the kitchen (thanks, FDR traffic), and I needed to blanch some green beans and corn but didn't want to wait for the water to keep boiling for each time. So, when I got home, I put up a huge pot of water, and started cutting the root vegetables, and then took a smaller pot to scoop up some boiling water to use for the string beans and then another one for corn. It was a real time saver!

Wednesday, July 15, 2015

Sorry, Mary

Lamb. Chops.

Today was day 2 of lamb day... Day 1 was butchery, so I didn't think y'all wanted to be a part of that. Yesterday we each cleaned and cut lamp chops and today we learned about how to prepare them to deliciousness.

The first thing I did was crack white peppercorns (using a skillet as my masher). I also got out some dried rosemary and crushed that up a bit. Once I had my spice mixture, I coated my lamb chops with it, and then smothered it in high temperature oil (like canola).

Then, I got my pan hot. Hot hot hot with no oil. So, I have a scorching hot, empty pan, and I have meat which is coated in oil. Once I knew my pan was hot, I started to sear my lamb chops.


After I got a good sear on each side of the chops, I placed them on a sizzle plate (which is basically an iron plate that goes in the oven...I've been using them every day and I kind of can't remember what it was like to cook without them), and placed the chops in the oven. For a rare cook, Chef says they should be in the oven for about 20-25 minutes, turning them over once about half way through. The problem today was that 5 other people were using the same oven, so the door kept opening and closing and the heat did not remain consistent. So, it took me a little longer.

While the lamb chops were in the oven, I got to work on my tarragon sauce. This sauce is a brown sauce, so you know we used the veal stock sauce that we made last week. Tarragon sauce is made up of dry vermouth, white wine, tarragon (duh), shallots, and demi glace (the veal stock sauce we made last week). The sauce wasn't coming out the way I wanted it to; it was a bit too thick and strong. Whenever you have a sauce that's too thick, you can always thin it out with more stock. That way, the taste of the sauce doesn't get diluted with water since the stock that you're adding has a ton of flavor.

We were also responsible for a starch and a vegetable for the plate. My buddy and I teamed up to make smashing mashed potatoes, complete with a full head of roasted garlic, sauteed onions, and a lot of love. Yum.

I found a recipe for french peas. I know, I know. How lame? I wanted to make them because peas are something I never cook, and this summer is all about going out of my comfort zone and trying new things and new tastes. Would I order peas in a restaurant? It's not a baad choice but I probably wouldn't. But now I know that peas go well with sauteed Boston lettuce (or green cabbage since we didn't have Boston lettuce today), and that they need sugar in thickener to bring out the sweetness.

The result?
Sorry for the ugly presentation. For some reason, the picture of my finished plate didn't come out well, but here I get to sheer with you what I had for dinner tonight.

In my humble opinion, the crust on the lamb was a bit too peppery and I would definitely tone it down on the pepper and crank it up on a mixture of other herbs and spices. But after everything, I don't think I'd ever had lamb chops before. And let me go out on a lamb here and say that it was so much fun to slave over them from fabricating to searing to cooking to plating to eating!

Tip of the day: When sautéing or searing things on a fire, use a high temperature oil that won't burn up very quickly. I know we've all gotten used to using olive oil because it's healthier, but the darker the oil, the lower the cooking temperature. Canola oil and other light oils can be used to saute or sear at a very high flame without burning. But hey, I'm not your mother. Use a darker oil. I dare you.  

I'll sheepishly admit it: Lamb puns are baad news. Good thing ewe wool not have to suffer through this any longer. 

Monday, July 13, 2015

What are you, chicken?

The past two days have been poultry days and Poultry Day 1 was Identification and Fabrication, i.e., butchery and whatnot. I have to say, I'm not completely disappointed that I missed Friday's butchery class. I know this class is designed for chefs who are probably buying their chickens whole, but I plan to continue to buy my chickens already butchered. Amen.

Poultry Day 2 was a little more my speed: cooking the bird. I'm down with that.

Chef has been telling us that there are two ways to cook. The wet and the dry. Wet cooking would include boiling, simmering, blanching, or poaching. Basically, any cooking with liquid, except oil. For some reason, frying in oil, even deep frying, fall into the dry cooking category. Dry cooks include baking, broiling, grilling, and frying. Then we get into the fun stuff: Combination cooking, otherwise known as..... anyone? Anyone? Braising.

Braising includes a dry and a wet cook. Today we made Chicken Cacciatore, which falls into the category of braising, apparently.

We dredged the chicken (on the bone) in seasoned flour, shook off the excess, and added it to a saute pan with hot oil. Starting with the skin side down (even if there's no skin on the chicken), we pan seared the chicken (dry cooking) just to get a nice golden brown color on the bird. Once the color came out nice, we removed the chicken from the pan, but kept all the goodness, or fond, or leftover drippings in the saute pan and added onions, mushrooms, tomatoes, chicken stock, demi glace, and seasonings. You guessed it, this is the liquid that will finish off the chicken. We brought the sauce to a boil, reduced it a bit, and added the chicken back to the pan.

Oh, what fun it is to flambe! That's right, it's amazing and terrifying and awesome and terrifying. But, I must give the class credit: the building still stands.


The brandy is what makes it flam and the white wine is what makes it bay. (I don't think that's actually a thing).

The thing that's great about the kitchen at school is that all of the saute pans are oven safe, too. I don't have that at home and I'd love to be able to put my pans in the oven (hint, hint). Anyway, we covered the pan tightly with a lid and put it in the oven for 25-30 minutes,turning the chicken over after 15 minutes [insert arm burn here].

My Chicken Cacciatore looks a little something like this:

De. Lish.

Then, Chicken Milanese! Named for the city of Milan, this chicken bares a striking resemblance to The Schnitzel. But, I assume we can't call it a schnitzel in this context.

We took a chicken cutlet and butterflied it so it opened up and was very thin. Not thin enough, I guess, since we beat the heck out of it to get it even thinner. Paper thin. Used an English breading station (flour, egg, breadcrumbs), and then pan seared it to get a golden brown color, and finished it off in the oven for 5 minutes. We had each individually prepared a tomato salad and an arugula salad which is frequently paired with schnitz.. I mean, with Chicken Milanese. When the chicken was ready, I sliced it into thick pieces, and plated it like this with my salads:

Tomorrow we start lamb! Yum! Butchery? Not so yum. But I hope we'll get to the good stuff soon enough. 

Tip of the day: When adding something to a pan of popping oil, always place the food in the pan in a motion that moves away from your body. This way, any pops or splatters will be aimed at the wall behind your stove and not at your eyes. Unless you want fancy eyes. 


Sunday, July 12, 2015

Two for one

This'll be two classes in one post since I slacked a little last week. Okay, a lot.

On Wednesday we continued learning about stocks. We had made a chicken stock earlier in the week, reduced it to a white sauce, made a consume with it, and used the stock as a base in other soups instead of using water so it had more flavor.

Wednesday was about veal stock. Using a veal of beef stock gives your soups or sauces a darker, more flavorful base. The veal stock process takes at least triple the time as a chicken stock does. Here's why:

We first started with the veal bones. In a normal sized stock, like one you would make at home, you'd probably use about 6-8 lbs of veal bones. We tripled the recipe and had about 25 lbs of bones in our massive pots. Massive.

We spread the bones on sheet pans and began roasting them to get a deep, brown color on them. After about 30 minutes, we spread tomato paste on each bone. We didn't have to cover each bone completely with the paste, but we make sure that each bone had some tomato on it. The acidity in the tomato paste is what helps to later break down the bones while they stew in the stock, which will ultimately make for a majorly flavorful stock. The veal bones went back in the oven for about an hour to continue to brown.

Then we started chopping the mirepoix. Remember that fancy word? That's the onions, celery, and carrots that go in as well. Only instead of just throwing them in the pot, we browned them as well so that the mirepoix would help contribute to the dark intense color of the stock as well.

We pulled the bones out and put them in the pot. Then we used the drippings in the pan to coat the mirepoix and popped those in the oven to get a roast. Meanwhile, we cut an onion in half (and a head of garlic) and placed it face down on a hot pan with no oil. Burn, you say? Why, yes. The burnt onion and garlic was added to the stock to, you guessed it, contribute to the darkness that we'd want in a veal stock.

The mirepoix came out and everything was added to a huge stock pot, bones, onion brûlée, spices, and water. Brought that to a boil and then simmered for the rest of the class. Oh, you think we turned that off after 3 hours? Sweetie, the veal stock was on the fire at a very very low simmer for about 21 hours.

We strained the stock in the morning and used the stock three ways:

First, we got started ipon an Espanol sauce. This is a "mother sauce" that can be used as a base for a variety of brown sauces to go with your meats. We made a roux which consists of fat and flour, added stock, and reduced until the flour cooked up and the sauce became nice a thick, "nape," which means that it coats the back of your spoon when you dip it in.

Then, we added more stock to the Espanol and reduced that even more. Reducing a sauce means boiling out the water to leave you with an ultra concentrated thick liquid. This was called a Demi glacé. Like the Espanol, Demi glacé can be used to base a lot of brown sauces.

Last, with whatever stock was left (which was not much), we made a beef and shiitake mushroom soup. Others made a French onion soup which I was planning on making after my shiitake soup, but the stock ran out.

Coming up this week: poultry and lamb! Gotta get it in before the 9 days.

Tip of the day: when making soup and skimming the top, move the pot off to the side so that the fire is on one edge of the pot. You'll start to notice the foam that you want to skim starting to collect on one side of the pot, making it easier for you to skim the foam and fat without taking out too much of your soup. 

Tuesday, July 7, 2015

Just so we're clear...

This week is a week of stocks, soups, and sauces. Today we focused on soups which had a chicken stock base, using the stock we made yesterday.

First, we started the consume` process. And oh, was it a process. Consume` is a soup very similar to chicken soup, only the vegetables and herbs and chicken are all strained out and the soup that is served is crystal clear. To make a consume`you need a few things that wouldn't necessarily come to mind... egg whites (for coagulation), burnt onion (for color), and ground chicken (since it goes through the meat grinder anyway).

We chopped the mirepoix, whipped the egg whites, and combined all of the ingredients and ran them through a meat grinder. We put the cold stock (remember: cold) on the fire and added the mixture. Eventually, the mixture slowly floated to the top of the liquid and created a "raft." We kept it at a simmer for a majority of the class.

I know. I totally get it. It looks like the most unappetizing thing you've ever seen. All I can say is try not to look directly at it. Did I have to post it on here? #sorrynotsorry

After it's been simmering for a couple of hours. it's seasoned with salt and white pepper (white pepper because you want the consume` to be super clear). Once it's been seasoned, it goes through a strain of several layers of cheesecloth to ensure its clarity. Like this:

And when it's finished it looks like this:
How clear is that?! It was really a fantastic process to be a part of, but to be honest, I can't ever imagine making a consume` again. Maybe if I were going into the restaurant business I'd want to perfect this on my own (this was a giant group effort), but I think I'm going to stick to my traditional chicken soup and try to perfect that at home.

Next up was Hungarian cabbage and apple soup. Now, I know what you're thinking. Hungarian? How could you? Well, I'll tell you how. I'll tell you exactly how.

I first cooked the cabbage, onions, and apple in the pot for about 10 minutes. The cabbage drastically reduced, as cabbage does when it gets wet. Then I added minced garlic, brown sugar, caraway seeds, and smoked paprika. Chicken stock and seasonings were added, soup was brought to a boil, and then white vinegar and sour salt were added last.

What is sour salt, you may ask? Think about the coating on a sour stick, and then think about adding that to your soup. Yeah, I know. Weird. But there's something to it, apparently.

I spent a while in front of the pot tasting the soup. Each time I tasted, I was paying attention to a different aspect. First taste, is there enough salt? Second, enough sugar? Third, vinegar? You get the idea. Tasting the soup like this is how the layers of flavors start to develop. I don't think I've ever paid that much attention to each ingredient after it's been added. I usually just taste for salt and pepper.

My finished product looked a little something like this:
You can't see it so well in the picture, but I cut the green apple brunoise (1/8 inch cubes) and garnished the soup with it, added a dash of smoked paprika, and finished it with parve sour cream and a parsley leaf. It was SO yum. I was skeptical of the sour cream at first, but it was such a great addition.

Then I got started on a Mulligatawny soup. This soup is an English soup modeled after an Indian dish. The spices in this soup reminded me of the dahl that we made last week: Turmeric, garam masala, cayenne pepper, and ground coriander. I'm not used to using these, but I'm loving them!

The soup had a deep, intense kick at the end of cooking, and after the soup was blended, coconut milk and lemon juice was added to cut the kick. Oh! I almost forgot about what makes this soup a meal! I poached some chicken is stock and once it cooled, diced it up and added it to the already pureed soup. We served it with basmati rice in the bowl. And there's your dinner.

I so enjoyed making these two soups since both of their flavors and techniques were unfamiliar to me. I also liked that today's class was directly related to what we worked on yesterday... I like seeing that consistency and connection in the kitchen.

Tip of the day: When poaching, you want to keep your liquid just under a boil. You want the liquid to be hot enough so it's moving but not boiling, and make sure you see steam rising off the top. The rule is: 7 minutes poaching for every 1 inch thick the protein is. Use tongs to flip the chicken in the stock, and make sure the chicken is completely covered in liquid as you're poaching. After the recommended time, stick a thermometer in the thickest part of the protein. You want it to read anywhere between 165-175 degrees F to be safe to eat. 

Monday, July 6, 2015

Are you stocking me?

A lot of recipes we make call for water or chicken (or vegetable) stock. The easy way out is always to use water, but when we opt for stock the end result is much more flavorful. There are boxed stocks that are available at the grocery, and of course, the all too familiar consume powder which can be added to any dish to make it more flavorful.

Another way to add flavor is to make your own stock at home. It's the most expensive way, the most time consuming way, but by far, the healthiest way. There is a wide variety of stocks that can be added to dishes (like rice, soups, or sauces) like chicken, vegetable, fish, or beef stock.

There is a basic formula to making a no-fail stock:


  1. Cold water- Why do we start with clean, cold water? Setting the ingredients in cold water slowly removes the flavor that we want and infuses it into what will become our stock.
  2. Bones- We're looking for young bones which have the highest percentage of cartilage to add the most flavor. Backs and necks are best to use in stocks. 
  3. Mirepoix (pronounced 'meer-pwa')- A vegetable mixture consisting of 50% onions, 25% celery, and 25% carrots. This is the perfect balance to flavor our stock. 
  4. Sachet- Herbs and spices in a cheesecloth, also called Bouquet Garni or an herb bundle.


The length of time that a stock cooks (or simmers) depends entirely on what type of stock you're making. Fish stock has the shortest simmering time of 45 minutes, vegetable stock about 2-3 hours, chicken stock 4-5 hours, and beef or veal stock about 8-10 hours. The longer the stock cooks, the bigger you cut your mirepoix vegetables. If you make tiny dice of mirepoix that'll be cooking in a beef stock, the vegetables will disintegrate, so you'll want to cut them bigger, if at all, for an 8-10 hour cook.

Put the bones in the cold water and bring the stock to a boil. Skim the top of the stock: there will be foam on the top that needs to come off. Take a ladle and try to only get the foam off of the top. Once the stock is skimmed, add the mirepoix and bring it back to a boil. Then simmer on low for the recommended time.

For stocks, no salt is added to the pot until ready to be used in a recipe. Why not? Because when you're making the stock, you don't necessarily know what it's going to be used for. So, keep it neutral, and only salt it when you're adding it to your dish.

When you're done cooking your stock, remove the mirepoix and strain the stock so it's clear.

We made a HUGE pot of chicken stock today (actually two pots) and we'll strain those and make consume tomorrow. Apparently, consume is the most pain-in-the-behind process. I'll tell you more tomorrow. Can't wait!

Tip of the day: When cooling down your soup (or stock), you have a few options to speed up the process without diluting your hard work. You can freeze water bottles beforehand (remove the labels) and place the frozen water bottles in the pot to rapidly cool down the soup without diluting it. Another way you can cool your soup is by pouring it into smaller metal containers (NOT plastic). Place the metal containers in an ice bath. The metal is a conductor, and will adapt to the ice bath around it and cool whatever is inside. Plastic containers can be used for storage and freezing. 

Sunday, July 5, 2015

Legu-me? Legu-you!

In America, protein is king. What did you have for dinner? The answer, most of the time, starts with the protein. "I had chicken with roasted vegetables." "Salmon and broccoli." Protein is king in these United States.

In most other countries in the world, legumes and grains are king. Fish, poultry, and meat are way too expensive to be had every day for lunch and dinner like we do in 'Murica. So, third world countries turn to grains and legumes. Rice, lentils, barley, chickpeas, and beans are all loaded with protein as well as carbs. Even though I'm not a vegetarian, I like a good veggie dish. Friday was (for the most part) vegetarian day.

We all started by making veggie burgers. Now, these are WAY different than the Morning Star ones you find in the freezer. These were absolutely amazing. Some ingredients included barley, chickpeas, oatmeal, eggs, and a bunch of great spices.

We used round cutters and measured them with the buns we were going to use. You want your burger to be slightly bigger than the bun. We cut the patties and put them in the fridge to set.

In the meantime, we got to work on the moneymaker.

Polenta. Sounds fancy on a menu, and appetizers with polenta usually cost $15-$20 and are about $1.50 to make. The plates look a little something like this:


We also made a spicy green bean recipe that Bubs would love. We plated our burgers with some slaw and green beans, and I added an avocado jalepeno sauce that went great with the burger. Chef says in America you can't serve a burger without a sauce. 


Stay tuned for stocks and soups tomorrow! 

Tip of the day: When toasting buns for burgers, turn your oven on broil and put the buns on a cookie sheet in the oven. They need 30 seconds, maybe 45 seconds, and take them out quickly! I left mine in for a minute and everything started smoking! 

Thursday, July 2, 2015

Potato, Potahto

Spuds. Everywhere.

This was way different than the way I usually make my potatoes. The kitchen was overflowing with potatoes being julienned, mashed, rounded, and mushroomed (but not fluted). Check this out: I cut around the bottom of a potato and left the top round to make the whole thing look like a mushroom.
Spiced and roasted them and drizzled with truffle oil and fresh parsley. It was delicious!

I also made potato croquettes, which kind of look like mozzarella sticks. I scooped out the inside of 2 lbs of potatoes, ran them through a food mill so they were real creamy. Added fresh ground nutmeg, salt, and pepper, and 1 egg and 2 egg yolks. The dough then went into a piping bag and I piped strips on the back of a cookie sheet:
Then cut and froze them (to harden) and then cut them into cork sized strips and breaded them in flour, eggs, and bread crumbs.

Then. I. Fried. Them.
They were so delicious and the entire kitchen smelled like Chanuka!
Here are some of the other things we made today:

Tip of the day: When breading food, set up the flour, eggs, and bread crumbs in 3 consecutive pans. Season every pan. Maybe add some herbs to the bread crumbs to give it some color. Once you start to bread, keep one hand dry and one hand wet so it's easier to handle. Use your right hand to dip into the flour, shake it off, drop it in the egg, and use your left hand to move it from the egg to  the bread crumbs. Then use your right hand again. It'll make breading a whole lot easier. 

Wednesday, July 1, 2015

Are You Smarter Than a Fifth Grader?

How many ounces in a cup? How many cups in a pint? Pints in a gallon? Who remembers these things? Better yet, who needs to remember these things these days?

For recipe conversion, rapid recall of these facts is crucial. Forget about doubling or halving a recipe. We converted recipes originally yielding 4 portions into 10 portions. Then, because that wasn't fun enough, we took recipes that yielded 8 portions, each 8 ounces, and converted it to 18 portions of 6 ounces. There was furious scribbling, quick calculating, and a lot of answers being yelled out.

A few quick conversions:

3 teaspoons= 1 Tablespoon
2 Tablespoons= 1 oz
8 oz= 1 cup
2 cups= 1 pint
2 pints= 1 quart
4 quarts= 1 gallon

So we did some quick conversions for things like these mentioned above. 1 sheet in our handout for "extra credit" had about 30 equations to figure out. And the last one, for all the jelly beans, was this:

How many teaspoons in 1 gallon? Aaaaand, GO! (answers in the comments, please! For the record, I've already figured it out, so I'm not cheating here!)

In other news, today was rice day. Chef paired me with another student and we quickly got to work. We started getting our Mise en Place (French for 'everything in place') together for dahl (an Indian spiced, red lentil dish). Everything came together nicely and efficiently; we happen to work well as a team. Once our dahl was put together and put on the stove to simmer for a while, Chef tasted ours and said it was perfect. (Insert bow here). We cleaned our stations and started getting together everything for the rice pilaf. As we were about to start the pilaf, Chef told us to put it aside, we would get to it later, and put together the Mise en Place for the Sri Lankan Rice. Aaaaaand we were going to demo it for the class.

After we finished the Sri Lankan demo, we finished it off in the oven, and retrieved our rice pilaf Mise en Place and quickly put up the rice pilaf. Once the stock reduced by half, we covered it tightly and finished that in the oven, as well.

We plated the pilaf by putting the rice in a ramiken, placing a plate on top and flipping it over. Removing the ramiken, you have a nice circle of rice in the center of the plate. Then we took the dahl and spooned it around the pilaf and garnished with some cilantro. For the record, when Chef showed us out to plate, he used our dahl (instead of his), and so did everyone else. By the time it came to packing up the food to take home, we didn't have any dahl left since it was all used up.

Last was pad thai. "Why would you make pad thai on rice day?" you may ask. Pad thai is made with rice noodles, and so, it's made on rice day. And it's eaten on rice day. And it's the most delicious on rice day.

Chef uses our Mise en Place for pad thai to demo for the class. He takes boiling water and puts it in a metal bowl, off the fire. He dumps in the rice noodles and tells us that how they'll cook, for 6-7 minutes. Meanwhile, the wok is on the fire with nothing in it. He says the key to it is really hot wok, cold oil. The oil immediately sizzles when it hits the wok and he scrambles two eggs quickly, sets them aside. More oil in the wok and ground turkey, garlic, chili paste go in the wok and are chopped up until cooked. Lime juice, soy sauce, peanuts, red pepper strips are all tossed in with the turkey. The rice noodles are strained and immediately added to the wok. Fresh chives and cilantro are added at the end, and he plates the pad thai. He then turns to me and my friend (and one other student) and asks us to make another batch of the pad thai. I had it for dinner...

Today was wonderful. Everything clicked and I felt right at home. I'm really excited for what's coming.

Quiz tomorrow... Wish me luck!

Tip of the day: Mise en Place means "everything in place." When you start a recipe, get all of your ingredients out from start to finish. I don't just mean to have them in front of you. Measure them out and put them in small bowls or cups at your workspace and put the containers back in the pantry. This way, once your start cooking, you won't fumble around with measuring spoons while your onions are burning because you didn't get the stock in the pot in time. It's a great time saver and makes cooking much easier!